Chapter 20. The Desktop Scheduler
- Table of Contents
- 20.1. Using the Desktop Scheduler
- 20.2. Adding a new event
- 20.3. Editing an event
- 20.4. Deleting an event
The PIXIL Desktop Scheduler stores information about the events you want to keep track of. Each event in the Scheduler store information about the event and when it will occur. You can also find events by searching for any text that appears in the event information.
20.1. Using the Desktop Scheduler
To use the Scheduler, choose the Date icon.

You can view your schedule by day, week, month, or year. To change the view, choose one of the tabs at the bottom of the window: Daily, Weekly, Monthly, or Yearly.
20.1.1. Using the Day View
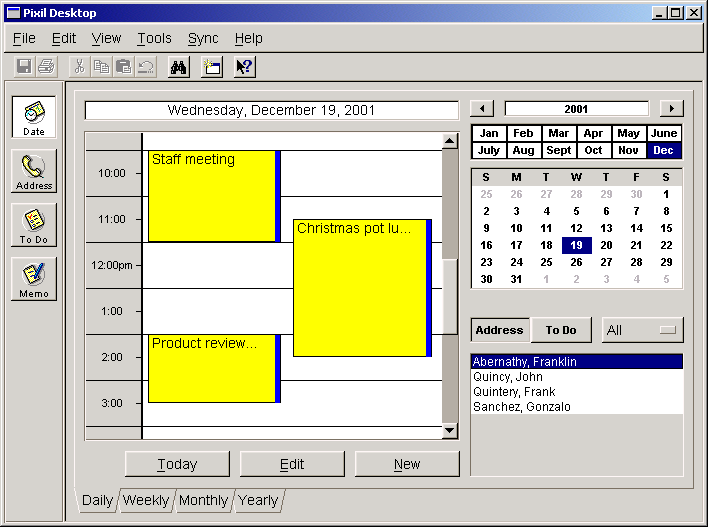
The day view shows the schedule for a single day. To choose a day you want to view, use the calendar.
To change this | Do this |
|---|---|
Year | Use the forward and back buttons next to the current year. |
Month | Click on the month you want to view from the list of months. |
Date | Click on the date you want to view form the calendar. |
The day view also displays a list of items from your Address Book or ToDo list in the list at the bottom right of the window. To display Address Book entries, choose the Address button above the list. To display ToDo entries, choose the ToDo button above the list. You can use the menu next the the buttons to limit the list to particular categories of entry, such as Business or Personal.
20.1.2. Using the Week View
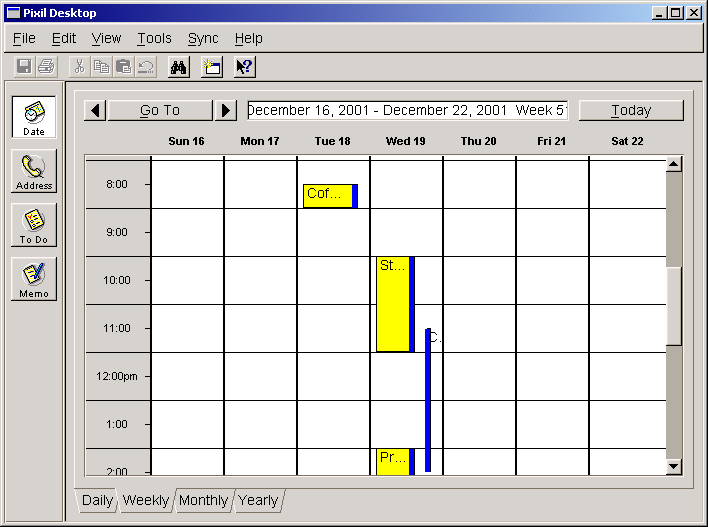
The week view displays all the events on your schedule for a full week. If today appears in the week view, you see that date colored red.
Use this button | To do this |
|---|---|
Back arrow | Go to the previous week |
Forward arrow | Go to the next week |
Go To button | Choose a particular week |
Today button | Go to this week |
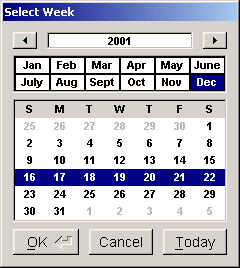
When you choose the Go To button, you see the Select Week dialog box.
20.1.3. Using the Month View
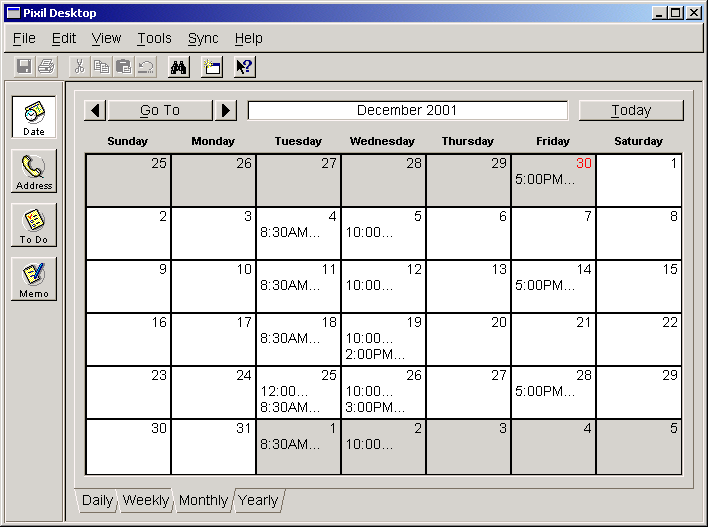
The month view displays all the events on your schedule for a full month. If today appears in the month view, you see that date colored red.
Use this button | To do this |
|---|---|
Back arrow | Go to the previous month |
Forward arrow | Go to the next month |
Go To button | Choose a particular month |
Today button | Go to this month |
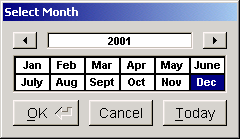
When you choose the Go To button, you see the Select Month dialog box.
20.1.4. Using the Year View
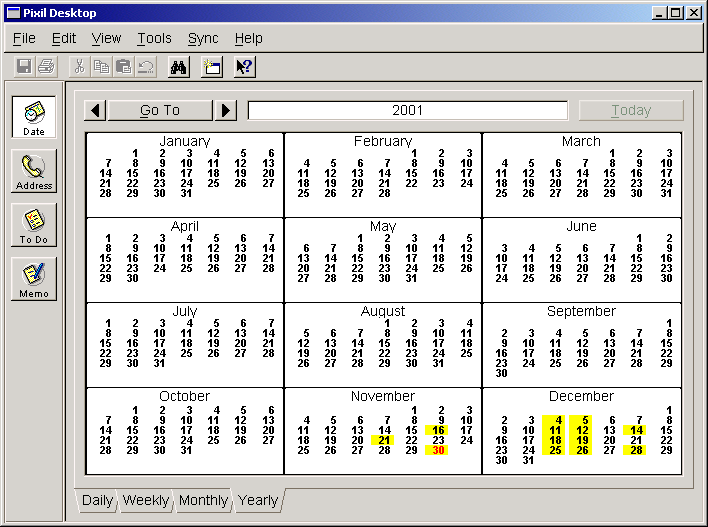
The year view displays an entire calendar year. Days on which you have scheduled events appear highlighted in yellow. If today appears on the calendar, its date appears colored red.
Use this button | To do this |
|---|---|
Back arrow | Go to the previous year |
Forward arrow | Go to the next year |
Go To button | Choose a particular year |
Today button | Go to this year |
When you choose the Go To button, you see the Select Year dialog box.
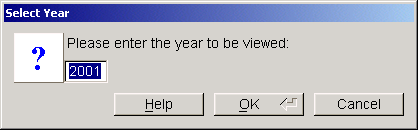
Enter the year you want to view and choose OK.