14.2. Adding a new task
Click the Add button.
The ToDo displays a new blank task.
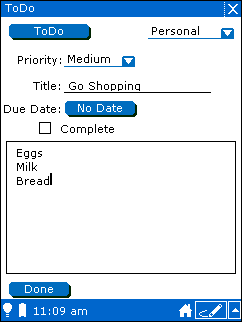
Choose a priority for this task by clicking on the Priority list.
Give the new task a name by filling in the task's Title field.
If you want to assign a due date, tap the Due Date button.
You see the Due Date dialog box.
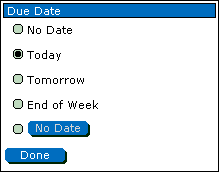
If you want to set a due date of today, tomorrow, or the end of the week, tap the appropriate radio button.
If you want to set a specific date, tap the radio button next to the No Date button and tap the No Date button.
You see the date chooser window.
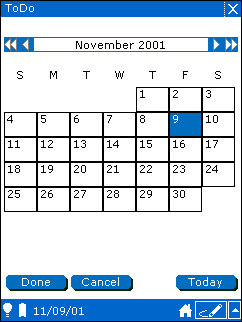
Choose the date you want to set and tap Done.
If you have completed the task, check the Completed check box.
You can add additional information about this task by entering text into the text field.
If you want to categorize this task, tap the category menu and choose the category to which you want to assign your new task.
Note: The ToDo application assigns the default category to new tasks based on the active category when you tapped the Add button. For example, if you are viewing tasks in the "Business" category when you tap Add, the ToDo application creates a new task with the category set to "Business". You can change a task's category at any time.
When you finish entering the task information, tap the Done button.
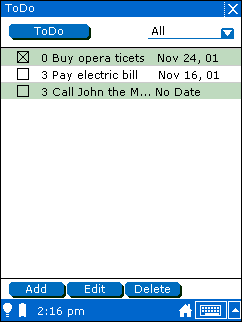
The ToDo application displays the name of your tasks along with priority you set for each task.